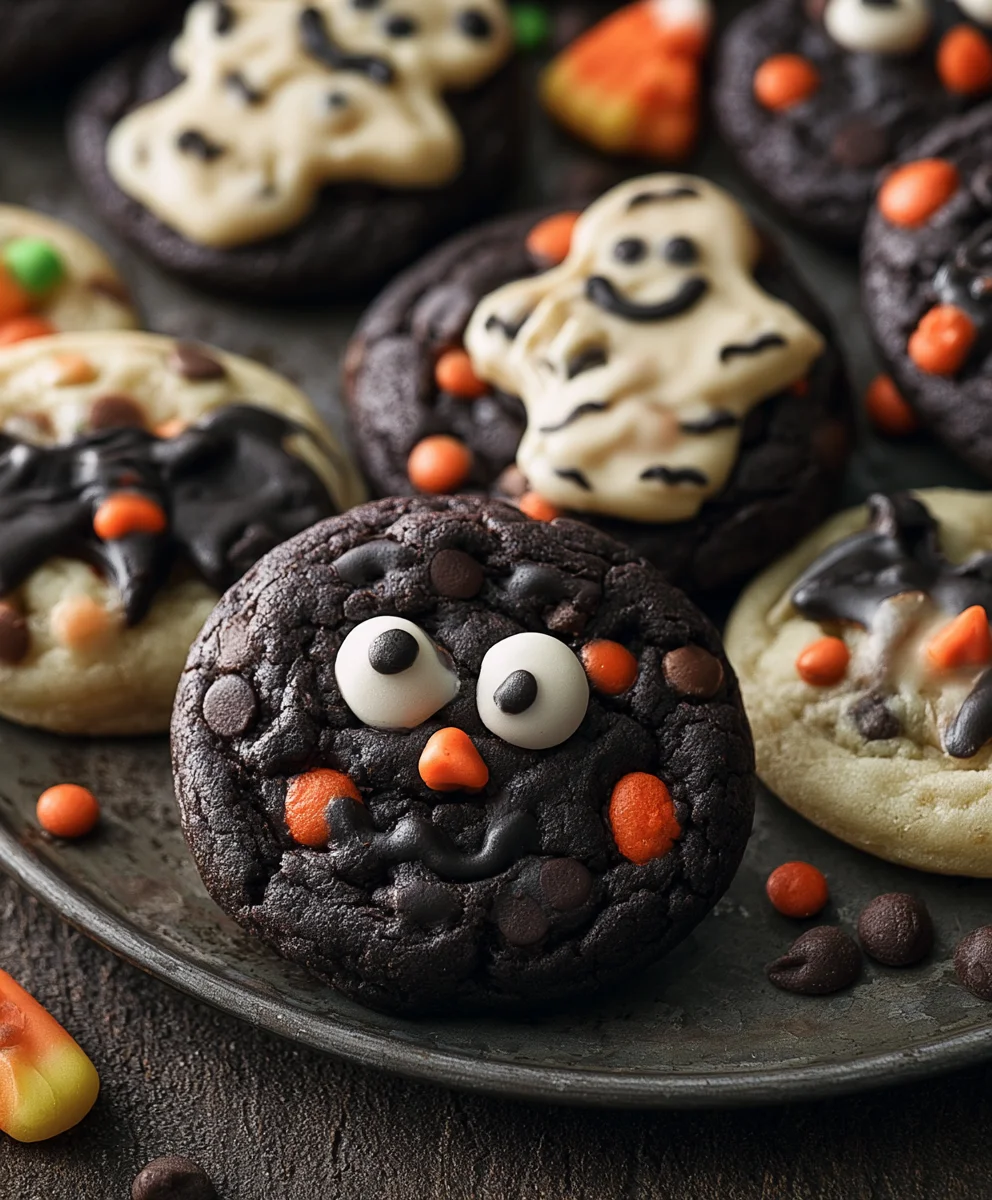
If you’re looking for spooky treats, these Halloween Cookies are exactly what you need this season. I’m sharing my favorite recipe for festive sugar cookies, which we’ll decorate with straightforward royal icing to create fun, seasonal designs like friendly ghosts, grinning pumpkins, and charming bats. This recipe works because the cookies themselves have a delightful buttery vanilla flavor and a tender texture that holds its shape perfectly, preventing any spreading during baking. The royal icing is simple to mix and sets firm, which means you can stack and store them easily without smudging. It’s an approachable recipe for bakers of any skill level, making it a great project to do with kids. I often serve these Halloween Cookies alongside a warm mug of apple cider for a cozy autumn afternoon snack.

Why You’ll Love This Recipe
You’ll adore these Halloween cookies because they’re not just a treat, they’re an experience! They bring together classic cookie comfort with a spooky, festive flair, making them perfect for any Halloween gathering or a fun baking session with the family. Their adaptability means you can get as creative as you like with decorations, ensuring every batch is uniquely yours.
Practical tips and tricks for best results
To ensure your Halloween cookies turn out perfectly every time, I have a few key tips. First, don’t skimp on chilling the dough; this is essential for preventing spreading and maintaining sharp shapes. When rolling, use just enough flour to prevent sticking, but not so much that you dry out the dough. Keep an eye on your oven; cookies are done when the edges are lightly golden, but the centers still look soft. For decorating, make sure your cookies are completely cool before applying any icing, and adjust your icing consistency carefully – it should be thick enough to hold its shape but thin enough to flow smoothly without running off the edges.
Common mistakes to avoid
Through trial and error, I’ve learned some common pitfalls to avoid. A frequent mistake is overworking the dough, which can lead to tough cookies. Resist the urge to add too much flour during mixing, as this also makes them dry. Another common error is baking cookies that aren’t sufficiently chilled, resulting in blurry shapes that lose their festive detail. Don’t overcrowd your baking sheets; this can lead to uneven baking and prevent air circulation. Finally, avoid decorating warm cookies, as your icing will melt, bleed, or slide right off, ruining your hard work.
Ingredient substitutions or variations
This recipe is quite forgiving and adaptable, making it easy to tailor to your preferences or dietary needs. If you’re looking for a gluten-free option, a 1:1 gluten-free baking flour blend works wonderfully; just ensure it contains xanthan gum for structure. For a dairy-free version, use a good quality plant-based butter stick in place of regular butter. You can easily change the flavor profile by adding different extracts; vanilla is classic, but almond, lemon, or even a hint of peppermint can add an interesting twist to your Halloween cookies. When it comes to coloring, feel free to experiment with natural food colorings derived from fruits and vegetables for a less artificial tint. Don’t limit yourself to just royal icing for decorating – buttercream can also be a delicious and softer alternative, and you can get creative with sprinkles, edible glitter, or small candies to make your Halloween designs pop.
Serving suggestions
These Halloween cookies are incredibly versatile for serving. They make a fantastic addition to any Halloween party dessert table, adding a festive touch that both kids and adults will appreciate. Consider arranging them on a tiered stand for a dramatic presentation. For a fun activity, set up a cookie decorating station at your gathering with plain cookies and various icings and toppings – it’s always a hit and encourages interaction. Of course, they’re also perfect simply enjoyed with a warm cup of coffee or tea, or a cold glass of milk for a cozy autumn evening treat.
Storage and make-ahead tips
Good news for planning ahead – these Halloween cookies store beautifully! Once baked and completely cooled, store undecorated cookies in an airtight container at room temperature for up to 5-7 days. If you’ve decorated them with royal icing, they can also be stored this way. If you’re using buttercream, it’s best to refrigerate them in an airtight container. For longer storage, both baked and unbaked cookie dough freeze exceptionally well. You can freeze the rolled-out, cut shapes on a baking sheet until solid, then transfer them to a freezer bag for up to 3 months. Bake from frozen, adding a minute or two to the baking time. Unbaked dough can also be wrapped tightly and frozen for up to a month. Thaw in the refrigerator before rolling and cutting, or simply bake directly from frozen for ultimate convenience.
Final Thoughts:
This recipe truly shines by offering a delightfully simple yet highly customizable way to bake festive treats that perfectly capture the spooky spirit of the season. I love how easily you can transform basic ingredients into charmingly spooky shapes, making the baking process as fun as the eating. To keep your ghoulish delights fresh and crisp, I recommend storing your finished Halloween Cookies in an airtight container at room temperature for up to five days. So, grab your cookie cutters, unleash your inner artist, and get ready to create some deliciously memorable Halloween magic!
Happy baking!
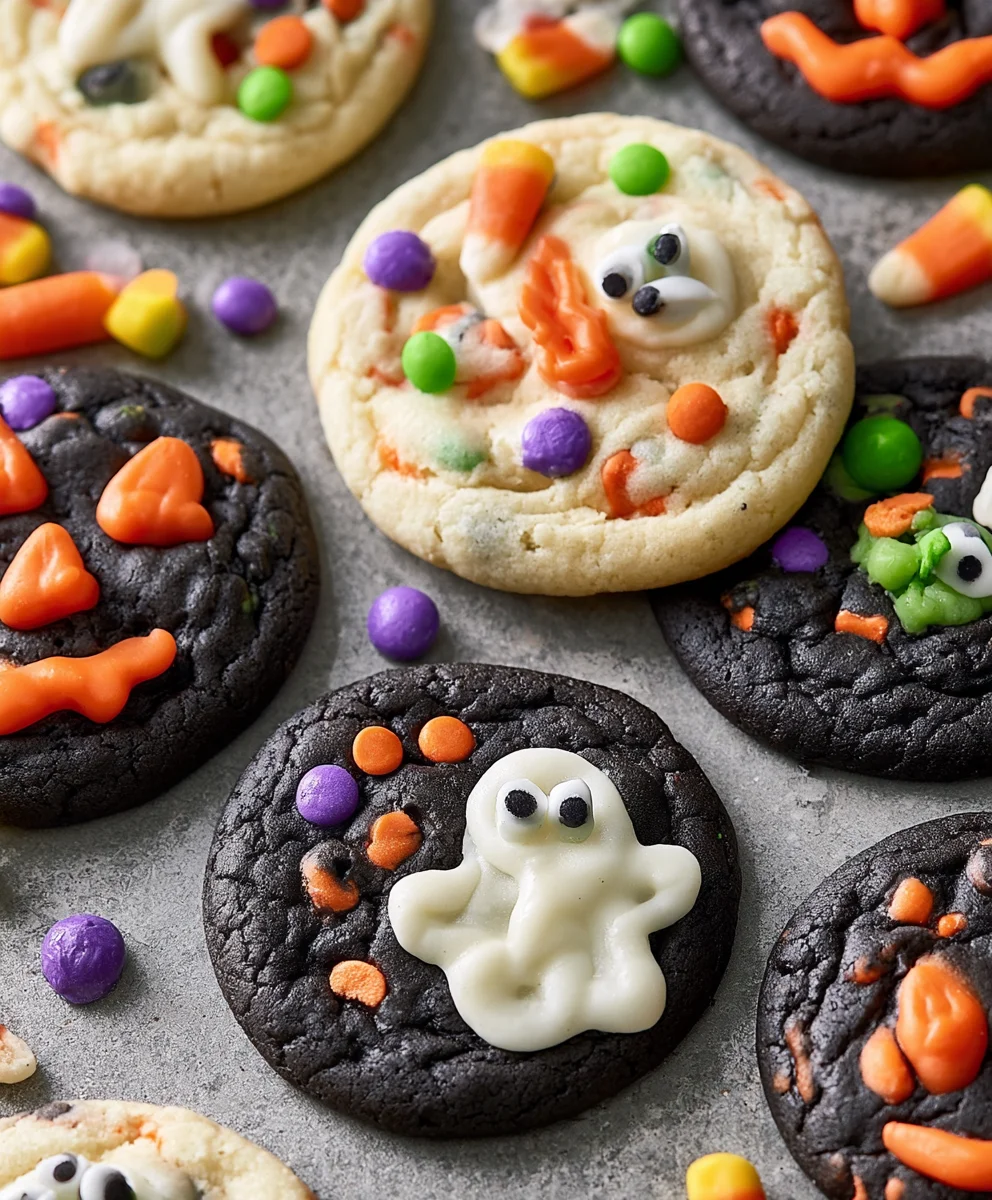
Easy Halloween Cookies: Spooktacular Treats Everyone Loves!
If you’re looking for spooky treats, these Halloween Cookies are exactly what you need this season. This recipe for festive sugar cookies includes straightforward royal icing to create fun, seasonal designs like friendly ghosts, grinning pumpkins, and charming bats. The cookies have a delightful buttery vanilla flavor and a tender texture that holds its shape perfectly. The royal icing sets firm for easy stacking and storage.
Ingredients
-
1/2 cup (113g) unsalted butter
-
1/2 cup (100g) granulated sugar
-
1/4 cup (50g) brown sugar
-
1 tsp vanilla extract
-
1 egg
-
1 cup (127g) all-purpose flour
-
1/2 cup (43g) black cocoa powder, sifted
-
1 tbsp cornstarch
-
1 tsp fine sea salt
-
1/2 tsp baking soda
-
1/4 tsp baking powder
-
1/2 cup (85g) white chocolate chips
-
1 cup (218g) Halloween M&Ms
-
Edible candy eyeballs
-
Royal icing (for decoration)
Instructions
-
Step 1
Cream butter, granulated sugar, and brown sugar until light and fluffy. Beat in vanilla extract and egg until well combined. In a separate bowl, whisk together all-purpose flour, black cocoa powder, cornstarch, fine sea salt, baking soda, and baking powder. Gradually add dry ingredients to wet, mixing until just combined. Fold in white chocolate chips and Halloween M&Ms. -
Step 2
Divide the dough into two discs, wrap tightly, and refrigerate for at least 1-2 hours (or until firm) to prevent spreading during baking. -
Step 3
On a lightly floured surface, roll the chilled dough to about 1/4-inch thickness. Use cookie cutters to create desired Halloween shapes (ghosts, pumpkins, bats). -
Step 4
Preheat oven to 350°F (175°C). Place cut cookies on parchment-lined baking sheets, leaving space between them. Bake for 8-12 minutes, or until the edges are lightly golden and centers look set. Avoid overcrowding baking sheets for even baking. -
Step 5
Let cookies cool on the baking sheet for a few minutes before transferring to a wire rack to cool completely. Ensure cookies are fully cool before decorating. -
Step 6
Once completely cool, decorate the cookies with royal icing, adjusting consistency so it holds shape but flows smoothly. Garnish with edible candy eyeballs, extra M&Ms, or white chocolate chips to create festive Halloween designs.
Important Information
Nutrition Facts (Per Serving)
It is important to consider this information as approximate and not to use it as definitive health advice.
Allergy Information
Please check ingredients for potential allergens and consult a health professional if in doubt.